Sign up to our newsletter and get free shipping on your orders!

How to Grow Sprouts at Home: A Beginner’s Guide

Growing sprouts at home is an easy and inexpensive way to add a greater variety of vitamins and nutrients to your diet. Sprouts can be used in many recipes, including salads, sandwiches, soups, and more. You don’t need a green thumb or even any knowledge of gardening. However, when you first start sprouting, it can seem a little overwhelming and you may not know exactly where to begin. The following guide will show you how to grow sprouts from seeds, what equipment you will need, and why you should start sprouting today. 

Sprouted chickpea and sprouted radish seeds


What are sprouts?

Sprouts are the first shoots of a plant. They are the result of the germination process and are basically the first stage of any seed transforming into a plant. The nutritional value of sprouts is many times higher than the nutritional value of a mature plant or its fruits. This is because the seed already includes all the vitamins and nutrients it needs to grow into a strong plant and the germination process is what activates these nutrients. This means the nutrients are more readily available to be absorbed by our body, also referred to as a high bioavailability. Simultaneously, the sprouting process breaks down certain proteins, which makes sprouts very easy on our digestion. If you have a sensitive stomach, sprouts are a great food for you as they are easy on your gut, whilst providing you with plenty of fiber, supporting healthy digestion. 


What are the benefits of sprouting?

Sprouts are a healthy food that has many benefits as they can supply you with a huge variety of vitamins and minerals. It is difficult for our bodies to absorb all the necessary nutrients from just one diet so sprouts can help fill in any gaps. Numerous studies have been conducted to show the benefits of sprouts and each one confirms that they are an excellent source of antioxidants, minerals, vitamins, plant protein, and essential amino acids.  The nutrient content is also increased because sprouts are low-calorie, high in fiber, and gluten-free. Additionally, if you are a vegan or vegetarian you will find that this food group provides you with plenty of protein compared to other plant-based food groups. The benefits of sprouts even extend to mental health as well; they contain tryptophan, which helps promote feelings of well-being and relaxation.

How to grow sprouts at home

Why Grow Sprouts at Home?

Sprouts have become readily available in most grocery stores these days. Unfortunately, they usually come with a hefty price tag, especially when you buy organic sprouts. Since sprouts are consumed raw, it is very important to be sure that they have not been sprayed with any pesticides or herbicides. Unfortunately, even when buying organic sprouts from a supermarket, you can never be sure they haven’t been contaminated. At the same time, sprouts are at their highest nutritional level after a few days of sprouting. That’s when commercially grown sprouts are packed and shipped off to supermarkets. By the time you put them in your cart, only a fraction of the vitamins and nutrients are left. 

Growing sprouts at home is much more affordable and you can be sure that they have not been contaminated with pesticides. You can consume them right when they are ready, getting the most nutrition out of your sprouts. On top of all that, growing sprouts at home is also very simple and so much fun. Watching your sprouts grow bigger by the minute will give you a great sense of accomplishment and joy.


Is growing sprouts at home safe?

Sprouts are a safe and easy food to grow. However, sprouts grow best in a warm and moist environment, which unfortunately is the same environment bacteria likes to grow in. But, the risk of contamination is slim to none, especially if you follow the guidelines in this post. Because you will only be growing a small number of sprouts in your home, the risk of contamination with bacteria is actually much lower than when consuming storebought sprouts, which have been grown in massive plantations. An essential part of growing sprouts at home safely is the equipment you use. You will need a sprouting jar that ensures good drainage so that any excess water can drain out. Standing water is the perfect breeding ground for bacteria to grow, so this should be avoided at all times. It is also important to ensure you always clean your equipment thoroughly before and after use. 


What equipment do you need to grow sprouts?

To ensure that your homegrown sprouts are a success every single time, it is important to have the right equipment. You will need a large glass jar (at least 500 ml, ideally 750 ml) with a mesh sprouting lid that ensures sufficient drainage for excess water. You will also need a holder to place the jar on, so the water does not clog up the lid and to ensure good airflow. It is also recommendable to have a tray underneath the sprouting jars to catch the excess water. If you want to sprout different varieties of seeds at once, you will need more than one jar. Ideally one jar per seed variety you want to sprout. A set of 2 jars is a great way to start as it enables you to continuously grow sprouts and ensures you always have some fresh sprouts to add to your meals. Lastly, you will need seeds, which are suitable for sprouting. 

How to grow sprouts at home

Choosing which seeds to sprout.

What can I sprout?

When it comes to sprouting, there is a huge variety of seeds, beans, legumes nuts, and even grains to choose from. You can grow alfalfa sprouts, mung bean sprouts, lentil sprouts, radish sprouts, and you can even grow broccoli sprouts. Whilst you can sprout almost all seeds in a sprouting jar, there are a few exceptions. Seeds like flax seeds, chia seeds, cress, arugula, and psyllium are gelatinous seeds. When you soak gelatinous seeds, they turn into a jelly-like consistency and will clog up the sprouting lid. These seed varieties are better sprouted on a tray.


Do I need special sprouting seeds?

It is very important to choose the right seeds because not all seeds are good for sprouting. First of all, it is important to look for raw seeds, which have not been treated with any chemicals, are organic and GMO-free. Toasted or roasted seeds will not sprout because the heat has destroyed the ability of the seeds to germinate. The same goes for irradiated seeds. The dried lentils you can buy in the supermarket, for example, are usually irradiated to make them last longer, thus won’t be good for sprouting. If you want to be completely sure that the sprouts you buy are good for sprouting, watch out for the word “sproutable” on the label or buy them from a shop that specialises in sprouting seeds. 


How to grow sprouts at home


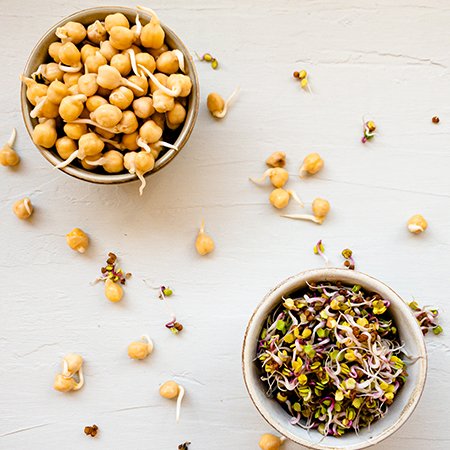
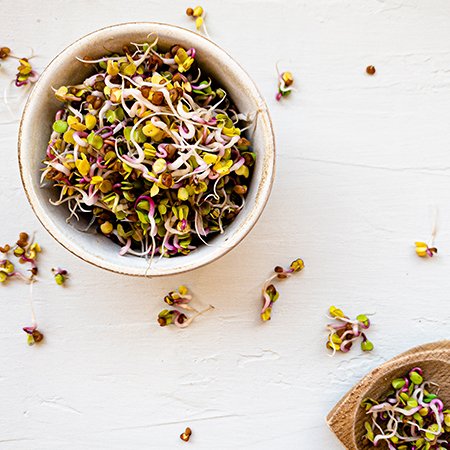
Learn how to grow sprouts to eat at home

Growing sprouts at home is a very simple process that does not require any prior plant or gardening knowledge. It also only takes a few minutes of your time, so even if you are a very busy person, Sprouts are a great way to add more nutrition to your meals.


Step 1: Soak your seeds

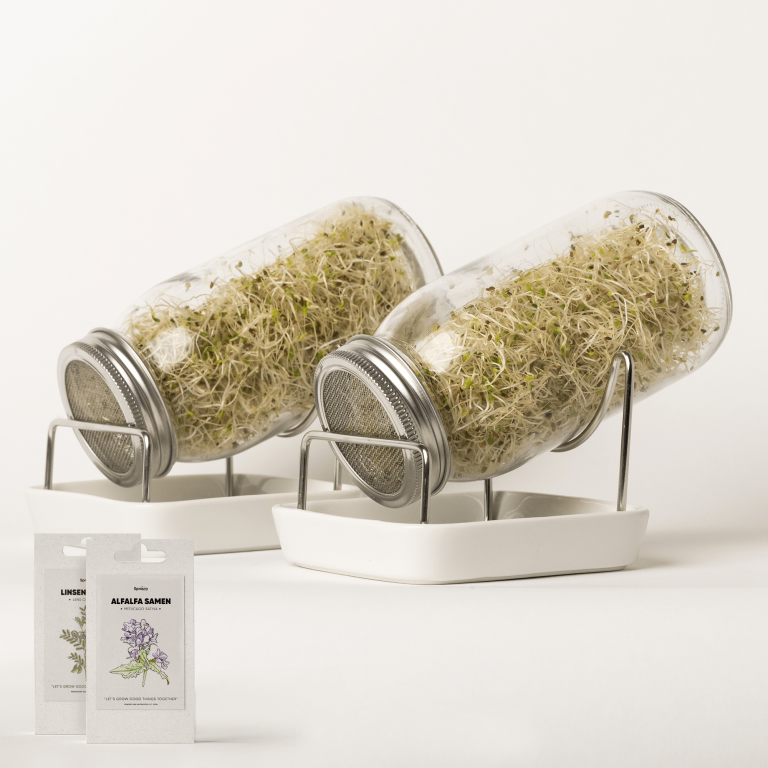
Add 2 Tbsp of seeds to a jar that is at least 500 ml big. This might not seem like a lot of seeds but sprouts expand a lot when growing, so it is important to ensure they have enough space. Fill the jar halfway with water, so that all seeds are covered and swim in the water. Always use cold water when soaking the seeds. The ideal temperature should be between 15ºC and 20°C, as this helps activate enzymes that are needed for germination. When you soak your seed in warm or hot water, this will prevent enzyme activity and make it impossible for these little plants to sprout. Let the seeds soak for about 12 hours, ideally overnight.


Step 2: Drain and rinse your sprouts

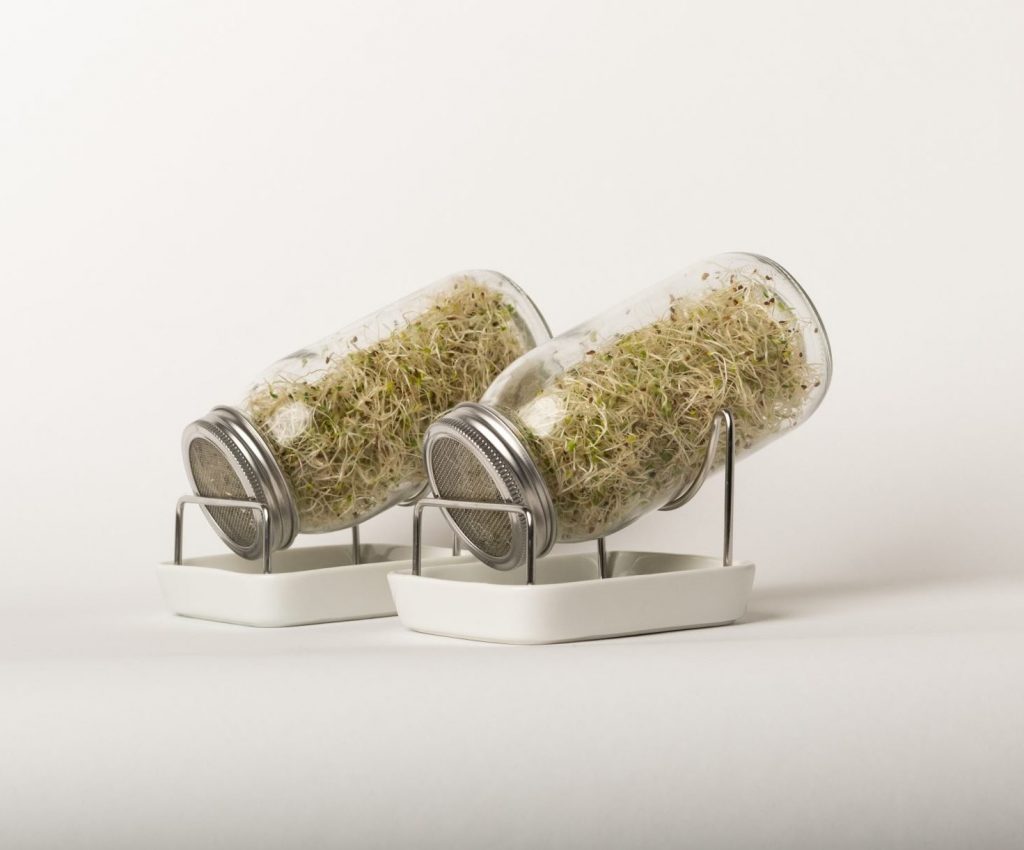
Once you have soaked your seeds, drain the excess water and fill the jar again with cold water. Make sure all the seeds are now covered in fresh cold water. Drain the water again through the mesh sprouting lid. Repeat this process two more times, to ensure all seeds have been thoroughly washed and drained. This is very important as it ensures that no chlorine or chemicals from tap water are left in your sprouting jar to affect seed germination. After you have rinsed your seeds, place the jar with the mesh lid down on the holder above the tray. This way any excess water can drip out and air can circulate.


Step 3: Rinse, drain, repeat

From now on, all you need to do is to repeat Step 2 twice a day. Simply rinse the seeds as explained in step 2, drain them, and put the jar back on the holder. A good routine is to do rinse your sprouts in the morning, and evenings, to ensure they are always nice and moist. Slowly but surely you can see how your sprouts are growing bigger every day.


Step 4: Harvest and store your sprouts

When your sprouts have reached the desired length, usually after about 3-4 days, it is time to harvest them. Simply remove the jar from the holder and place it in the fridge. The fridge is the best space to keep your sprouts fresh and nutritious. Do not rinse your sprouts right before placing them in the fridge as this can encourage bacteria growth and will shorten the amount of time your sprouts stay healthy, crunchy, and delicious. 


Step 5: Enjoy your sprouts

Now that you have successfully grown your sprouts, it is time to enjoy them. Add the sprouts to a salad or sandwich for an extra boost of vegetable goodness. They are also a great addition to a smoothie, a stir-fry, or as a soup topping. The possibilities are endless!

Sprouty Jar Starter Set Package

Try It For Yourself!

The Sprouty Starter Set includes everything you need to get started: two jars with stainless steel mesh lids for continuous sprouting, high-quality ceramic trays, and two packages of seeds so that you can get started right away!

Hannah Reeves

Hey, I am the founder of Live Sympler and I am passionate about sustainability and living a simpler and happier life. I love to cook, I am a huge coffee fan and I can not live without the sunshine. That's why I moved to Portugal. When I don't work on Sympler, I am working to transform a neglected piece of land into a permaculture food forest.
Recent Comments

    Sympler Products

    Products that are good for you and for the earth.

    Sprossensamen Set

    Sprouty – Organic Microgreens Seed Set

    29.99

    Sprouty Jar Starter Set Package

    Sprouty – Sprouting Jar Starter Set

    34.99